Looking for a fun and creative way to wow your guests at your next celebration? A Hello Kitty cake is the perfect choice! Whether you’re planning a kids’ birthday party or simply want to surprise someone special, this delightful cake is sure to steal the show. Not only is it visually stunning with its adorable Hello Kitty design, but it’s also surprisingly easy to make with the right ingredients and a little love. Picture a beautifully frosted cake that combines sweetness and nostalgia, bringing a smile to anyone who sees it. Ready to get baking? Let’s dive into this simple yet impressive recipe that will leave everyone asking for a slice!
Key Benefits of Making a Hello Kitty Cake
Baking a Hello Kitty cake isn’t just about creating a delicious dessert—it’s an opportunity to bring a smile to faces of all ages. Whether you’re a beginner or a seasoned baker, this cake offers some great benefits that make it worth the effort.
- Fun and Creative: The Hello Kitty design is perfect for unleashing your creativity. From frosting details to adding fun elements like bows or whiskers, you can easily customize the cake to reflect your style and skill level.
- Kid-Friendly Appeal: Kids adore anything with their favorite characters, and Hello Kitty is no exception. Whether it’s for a birthday party or a special occasion, this cake will be a hit with little ones, making it a fantastic addition to any celebration.
- Simple Yet Impressive: Don’t let the charming design fool you—this cake is surprisingly easy to make! With the right ingredients and a few simple steps, you’ll have a cake that’s both visually stunning and incredibly tasty.
- Versatile: The Hello Kitty cake can be adapted to various dietary needs. Whether you prefer a classic vanilla sponge, a rich chocolate base, or even a gluten-free or dairy-free version, this recipe can be customized to fit your preferences and the needs of your guests.
- Conversation Starter: A beautifully decorated cake is always a crowd-pleaser. When you serve this cute, colorful Hello Kitty cake, you’re sure to get compliments and maybe even some curious questions about how you made it.
The benefits are clear: a Hello Kitty cake is not only a joy to make, but it’s also a dessert that brings people together, makes memories, and, of course, tastes delicious. Now, let’s get into the fun part—baking!
Ingredients for Your Hello Kitty Cake
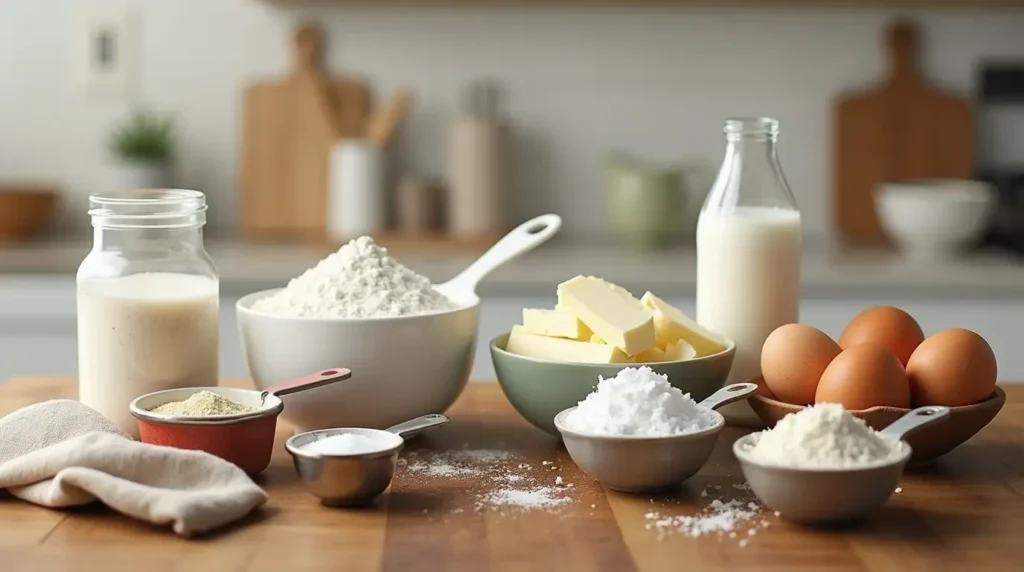
Now that you’re excited about making this adorable Hello Kitty cake, let’s gather the ingredients you’ll need. Whether you’re baking for a birthday party or just a fun treat, these basic ingredients will help you create a sweet masterpiece.
Cake Base:

- 2 ½ cups all-purpose flour – The foundation of your cake! Use all-purpose flour for a light, fluffy texture.
- 2 tsp baking powder – To help the cake rise beautifully.
- 1 tsp baking soda – Works alongside the baking powder for the perfect fluffy texture.
- 1 ½ cups granulated sugar – Adds sweetness and moisture to the cake.
- ½ cup unsalted butter (softened) – For richness and that classic cake flavor.
- 4 large eggs – These will bind everything together and give structure.
- 1 cup whole milk – Adds moisture to the batter.
- 2 tsp vanilla extract – For that warm, sweet flavor that compliments the cake.
Hello Kitty Decorations:

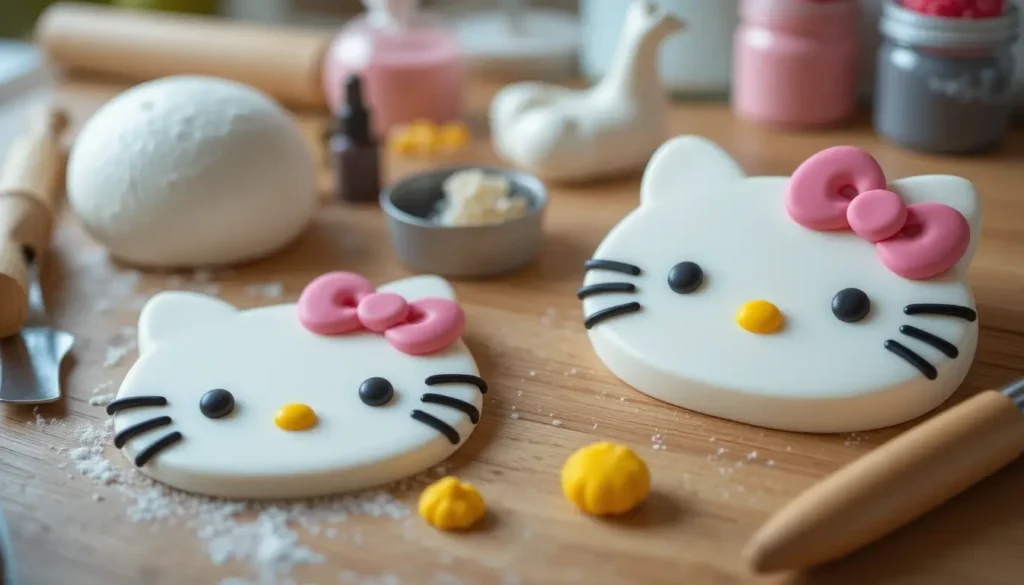
- Fondant (white) – The key ingredient for the Hello Kitty design. It’s smooth and perfect for shaping.
- Pink fondant – For creating Hello Kitty’s bow. You can also use pink food coloring if you’d rather color the white fondant.
- Black food coloring or edible markers – To create the cute whiskers and eyes.
- Yellow fondant or candy – For the nose, giving Hello Kitty her iconic look.
Frosting:
- 2 cups heavy cream – This will be whipped to make a smooth, fluffy frosting.
- 1 cup powdered sugar – For sweetness and structure.
- 1 tsp vanilla extract – To flavor your frosting.
Optional for Extra Flavor:
- 1 cup mini chocolate chips – For adding a fun, chocolatey layer or as sprinkles.
With these ingredients, you’re set to make a cake that’s as delightful to look at as it is to eat! The Hello Kitty cake design can be customized further depending on your creative ideas, but these basic ingredients will ensure your cake tastes as amazing as it looks. Ready to start baking? Let’s move on to the next step!
How to Make the Perfect Hello Kitty Cake for Any Occasion
Now comes the fun part—putting everything together to create your very own Hello Kitty cake! With these easy-to-follow steps, you’ll be able to bake and decorate like a pro. Let’s get started:
Step 1: Prepare Your Cake

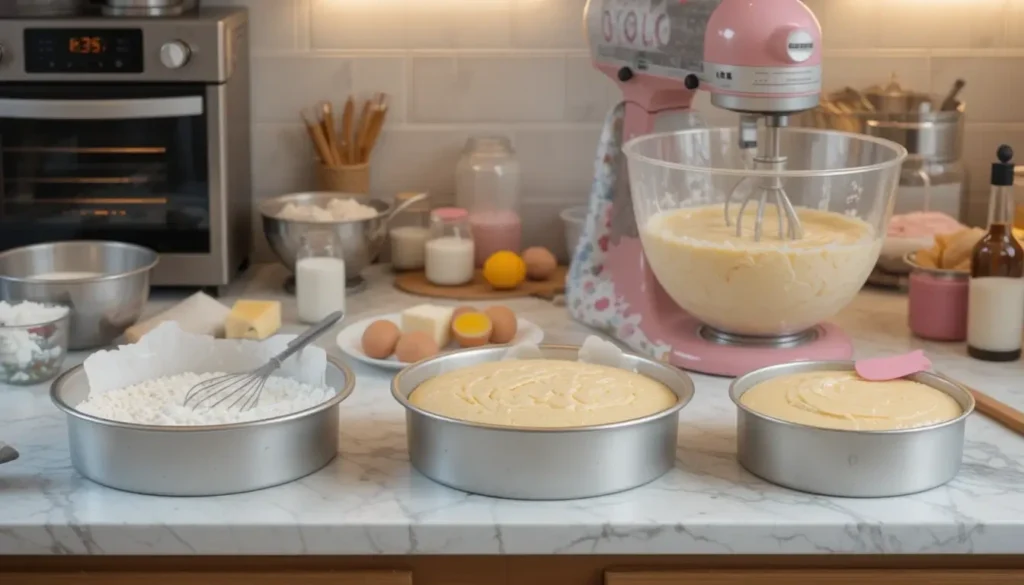
- Preheat your oven to 350°F (175°C). Grease and flour two 9-inch round cake pans to prevent sticking.
- Mix dry ingredients: In a medium bowl, whisk together the all-purpose flour, baking powder, baking soda, and salt. Set aside.
- Cream butter and sugar: In a large bowl, beat the softened butter and granulated sugar until light and fluffy—this should take about 3-5 minutes.
- Add eggs: One by one, add the eggs to the butter and sugar mixture, mixing well after each addition.
- Combine wet and dry ingredients: Gradually add the dry ingredients to the wet mixture, alternating with the whole milk. Start and end with the dry ingredients. Add the vanilla extract for extra flavor.
- Pour into pans: Divide the batter evenly between the prepared cake pans and smooth the tops with a spatula.
- Bake for 25-30 minutes or until a toothpick inserted in the center comes out clean. Allow the cakes to cool in the pans for 10 minutes before transferring to a wire rack to cool completely.
2: Make the Frosting
- Whip the heavy cream: In a chilled mixing bowl, whip the heavy cream until soft peaks form.
- Sweeten and flavor: Gradually add the powdered sugar and vanilla extract, continuing to whip until stiff peaks form. The frosting should be smooth and hold its shape.
3: Assemble the Cake
- Level the cakes: Once the cakes are fully cooled, use a serrated knife to trim the tops of each cake to make them even.
- Stack and frost: Place the first cake layer on your serving plate. Spread a generous amount of whipped frosting on top. Place the second cake layer on top and frost the entire cake with a smooth, even layer of frosting.
- Smooth the frosting: Use a spatula to carefully smooth out the frosting for a neat finish.
4: Decorate the Hello Kitty Design
- Roll out the fondant: Roll out the white fondant on a clean surface dusted with powdered sugar. Use it to cover the entire top of the cake, smoothing it out with your hands or a fondant smoother.
- Shape the features: Use the pink fondant to shape a bow. Roll small pieces of the yellow fondant to create Hello Kitty’s iconic nose. For the whiskers and eyes, use black food coloring or edible markers to draw delicate details on the fondant.
- Add finishing touches: Arrange the bow and nose carefully on the top of the cake, and draw the whiskers to complete the look.
Step 5: Serve and Enjoy
Once your Hello Kitty cake is decorated, it’s time to serve! Cut into slices and enjoy the delightful combination of flavors and fun design. Whether you’re serving this at a birthday party or just as a fun treat, it’s sure to bring joy to everyone who tastes it.
This easy-to-follow guide should make creating your Hello Kitty cake a smooth and enjoyable experience. Keep in mind, the cake can be customized further, so feel free to get creative with the decoration or flavors!
Pro Tips and Variations
To ensure your Hello Kitty cake turns out as fabulous as it looks, here are some pro tips and creative variations to elevate your baking game. With these insider tips, you’ll be able to customize and perfect your cake every time.
Pro Tips:
- Use room-temperature ingredients: Ensure that your butter, eggs, and milk are at room temperature before you start baking. This helps create a smoother batter and ensures even mixing, resulting in a fluffier cake.
- Level your cakes: If your cakes rise unevenly, use a serrated knife to level them. This creates a neat base and makes stacking the layers easier, ensuring the design sits perfectly on top.
- Don’t overmix the batter: When combining the wet and dry ingredients, mix until just combined. Overmixing can result in a dense cake, so be gentle.
- Chill your fondant tools: If you’re having trouble working with fondant, chill your rolling pin or fondant smoother. This helps prevent the fondant from sticking and ensures a smooth finish on your cake.
Creative Variations:
- Flavored cake layers: You can customize the flavor of the cake by adding ingredients like lemon zest, cocoa powder, or almond extract. A chocolate Hello Kitty cake would be a crowd-pleaser!
- Fillings: Add a layer of jam, buttercream, or even fruit between the cake layers for a sweet surprise. Raspberry or strawberry jam pairs wonderfully with the vanilla flavor of the cake.
- Different designs: While Hello Kitty’s classic bow is a favorite, you can create custom Hello Kitty cake designs. Consider using colors like blue or purple for a more personalized look, or even add her friends from the Sanrio universe for a unique twist.
- Healthier options: For a lighter version of this cake, substitute some ingredients. You can use Greek yogurt in place of butter for a healthier cake, or use a low-sugar fondant if you’re cutting back on sweets.
By following these tips and exploring these variations, you’ll be able to make a Hello Kitty cake that is not only visually stunning but also delicious and uniquely tailored to your tastes!
Serving Suggestions
Now that your Hello Kitty cake is beautifully baked and decorated, it’s time to think about how to serve it in style. Whether you’re celebrating a special occasion or just want to bring a little fun to your next gathering, these serving suggestions will help you make the most of your creation.

Serving Ideas:
- Birthday Parties: A Hello Kitty cake is perfect for themed birthday parties, especially for kids. Pair the cake with matching party decor like Hello Kitty plates, napkins, and even party hats. It’s sure to be the centerpiece of any celebration.
- Tea Parties: This cake also makes a charming addition to a tea party. Serve it alongside light finger sandwiches, scones, and a selection of teas for a refined, whimsical spread.
- Picnics: The cake’s simple, yet playful design makes it ideal for outdoor gatherings. Pack slices into individual servings for a portable and fun treat.
- Holiday Treats: For holidays like Valentine’s Day or Easter, consider tweaking the design with seasonal colors or accessories. A Hello Kitty cake is versatile enough to suit any festive occasion.
Pairing Suggestions:
- Ice Cream: Serve a slice of your Hello Kitty cake with a scoop of your favorite vanilla or strawberry ice cream. The creamy texture complements the cake’s sweetness perfectly.
- Fresh Fruit: Fresh berries, such as strawberries, raspberries, or blueberries, are a great accompaniment to balance the sweetness of the cake. They also add a pop of color to the dessert plate.
- Milk or Hot Chocolate: For kids (and the young at heart!), pairing the cake with a tall glass of milk or a cozy cup of hot chocolate will make it an extra special treat.
Portion Control:
- Cupcake Version: For smaller servings, consider making Hello Kitty cupcakes. Simply use the same cake recipe, bake in muffin tins, and decorate each cupcake with Hello Kitty’s signature bow and whiskers. This is perfect for parties or gatherings where individual servings are preferred.
- Mini Cake: If you’re hosting a smaller event, you could also make a mini version of the Hello Kitty cake by using smaller cake pans or a cupcake cake. This allows you to serve a personalized, individual-sized dessert for each guest.
By using these serving ideas, you’ll not only delight your guests with a delicious and beautiful Hello Kitty cake, but you’ll also create a memorable experience that fits any occasion. Whether it’s a birthday, tea party, or holiday feast, your cake will be the star of the show!
Conclusion
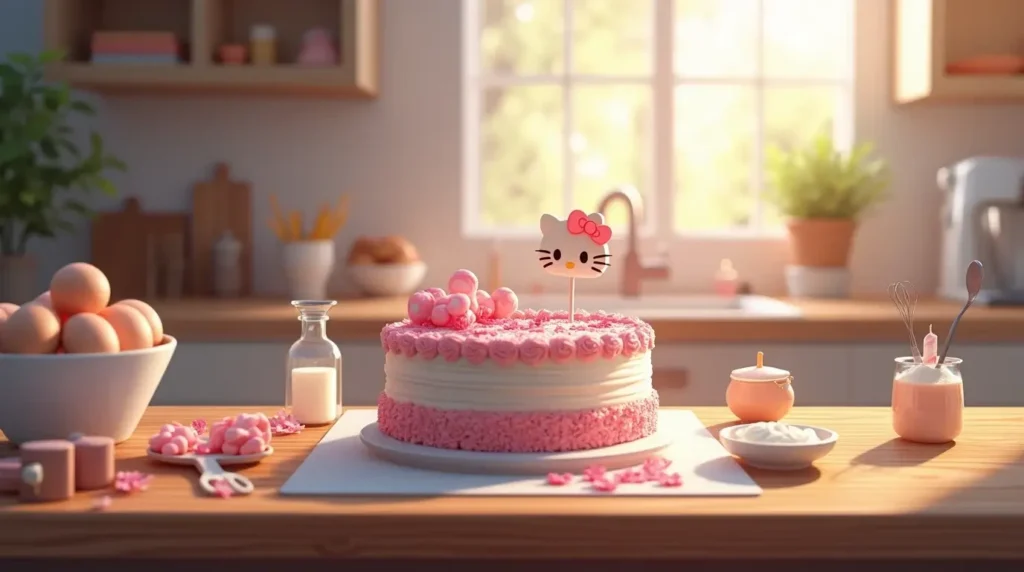
Congratulations, you’ve made it through the steps and now you have a stunning Hello Kitty cake that’s sure to impress anyone who sees it! This cake isn’t just about the adorable design; it’s also delicious and perfect for any occasion. Whether you’re hosting a birthday party, a tea gathering, or just indulging in a sweet treat, your Hello Kitty creation will be the highlight of the day.
The best part is that this recipe is versatile. You can personalize it with different flavors, colors, and designs, ensuring it fits your taste and the theme of your celebration. Remember, baking is all about creativity and fun, so don’t hesitate to experiment with different variations or add your own twist.
Key Takeaways:
- The Hello Kitty cake is a great choice for themed parties, birthdays, or even casual gatherings.
- Personalize the cake by experimenting with flavors and decorations to make it your own.
- Don’t forget to pair it with ice cream, fresh fruit, or a hot beverage to enhance the experience.
We hope this recipe inspires you to create a memorable dessert that brings smiles to your guests. Whether you’re an experienced baker or just starting, this cake is fun to make and a joy to share. Enjoy the process and savor the compliments that are sure to come your way! Happy baking!
“If you’re looking to make a Hello Kitty cake in a fun and easy way, check out the [Hello Kitty cake recipe] we have on our site.”
FAQs
Here are some frequently asked questions to help guide you as you create your Hello Kitty cake and ensure everything goes smoothly. These answers should address any concerns or curiosities you may have about the recipe.
1. Can I use a different flavor for the cake?
Absolutely! While the recipe uses a classic vanilla or chocolate cake base, you can swap it for any flavor you prefer. Try strawberry, lemon, or even red velvet for a fun twist. Just ensure the cake layers are sturdy enough to support the decorations.
2. How do I make the Hello Kitty design more detailed?
To enhance the Hello Kitty design, use fondant for smooth, clean edges when creating the face, bow, and whiskers. You can find pre-colored fondant in various shades, or you can color it yourself using gel food coloring. A fine-tipped edible marker or piping gel will help you add delicate details like her eyes, nose, and whiskers.
3. Can I make this cake ahead of time?
Yes! This Hello Kitty cake can be made in advance. You can bake the cake layers one or two days ahead and store them in an airtight container at room temperature. If you’re preparing the decorations ahead of time, store them separately in a cool place or refrigerate the fondant to maintain its shape. Just be sure to assemble the cake on the day you plan to serve it for the freshest result.
4. Can I make this cake gluten-free or dairy-free?
Yes! You can easily adapt this recipe for gluten-free or dairy-free diets. Use a gluten-free flour blend in place of regular flour, and for dairy-free options, substitute the milk and butter with almond milk and dairy-free margarine or coconut oil. You may also want to use a non-dairy frosting to ensure the entire cake fits your dietary needs.
5. How can I store leftovers?
To store any leftover Hello Kitty cake, simply cover the cake with plastic wrap or place it in an airtight container. It can be kept at room temperature for 2–3 days, or you can refrigerate it for up to a week. If you plan to store it for a longer period, consider freezing the cake slices in an airtight container for up to a month.
6. How can I make this cake more suitable for adults?
For an adult-friendly version, consider adding subtle flavors like espresso, hazelnut, or chocolate ganache. You can also swap out the bright colors for a more sophisticated palette, using softer pastels or even metallic edible paints for a refined finish.
7. Can I make the Hello Kitty cake into cupcakes?
Yes, absolutely! To turn this cake into Hello Kitty cupcakes, simply bake the cake batter in a muffin tin. Decorate each cupcake with the same Hello Kitty design, creating individual servings that are perfect for parties or school events. Use mini bows or different expressions on each cupcake for an extra fun touch.
We hope these answers help you feel more confident as you tackle this fun and delightful recipe. If you have any more questions, don’t hesitate to reach out! Happy baking!
“You can also discover [the best birthday party ideas] to get extra inspiration for your next celebration.”

